Travelling By Air
Air Travel With A Handicap Scooter With Lithium Batteries
Lithium batteries have become increasingly popular due to their almost ten-fold energy density (power to weight) and superior longevity over lead-acid batteries. However, lithium batteries pose a certain fire risk, which is why transportation rules and regulations (mainly for air transport, but also land and sea) have been put in place governing their manufacture and carriage.
The IATA (International Air Transport Association) was the lead agency in this effort.
Special allowance for medical mobility devices accompanying handicapped passengers
Battery capacity is determined by multiplying Volts (V) by Ampere-hours (Ah) to get Watt-hours (Wh), which has been adopted as the measure for air transport. The upper limits for lithium-ion batteries for so-called Consumer Electronics such as cell phones and laptop computers are 100Wh, and 160Wh for tools and appliances. These limits are a bit low for electric vehicles, and therefore a special allowance was made for medical mobility devices accompanying handicapped passengers. This permits one main battery of up to 300Wh. In addition one spare battery of up to 300Wh or two 160Wh spares.
All lithium-ion batteries must be tested per UN38.3 by an internationally recognized facility, and this must be displayed on the battery. Most airlines adhere to the IATA guidelines, but a few, mostly small, airlines deviate and allow only 160Wh.
Below is battery documentation to download and print as well as a list of airlines that impose this limit and/or deviate from other standard practices (this list may not be comprehensive).
We generally recommend visiting the website of your airline and viewing their information for travellers with special needs. Tell your airline that you will be traveling with your mobility scooter.
All lithium-ion batteries must be tested per UN38.3 by an internationally recognized facility, and this must be displayed on the battery. Most airlines adhere to the IATA guidelines, but a few, mostly small, airlines deviate and allow only 160Wh.
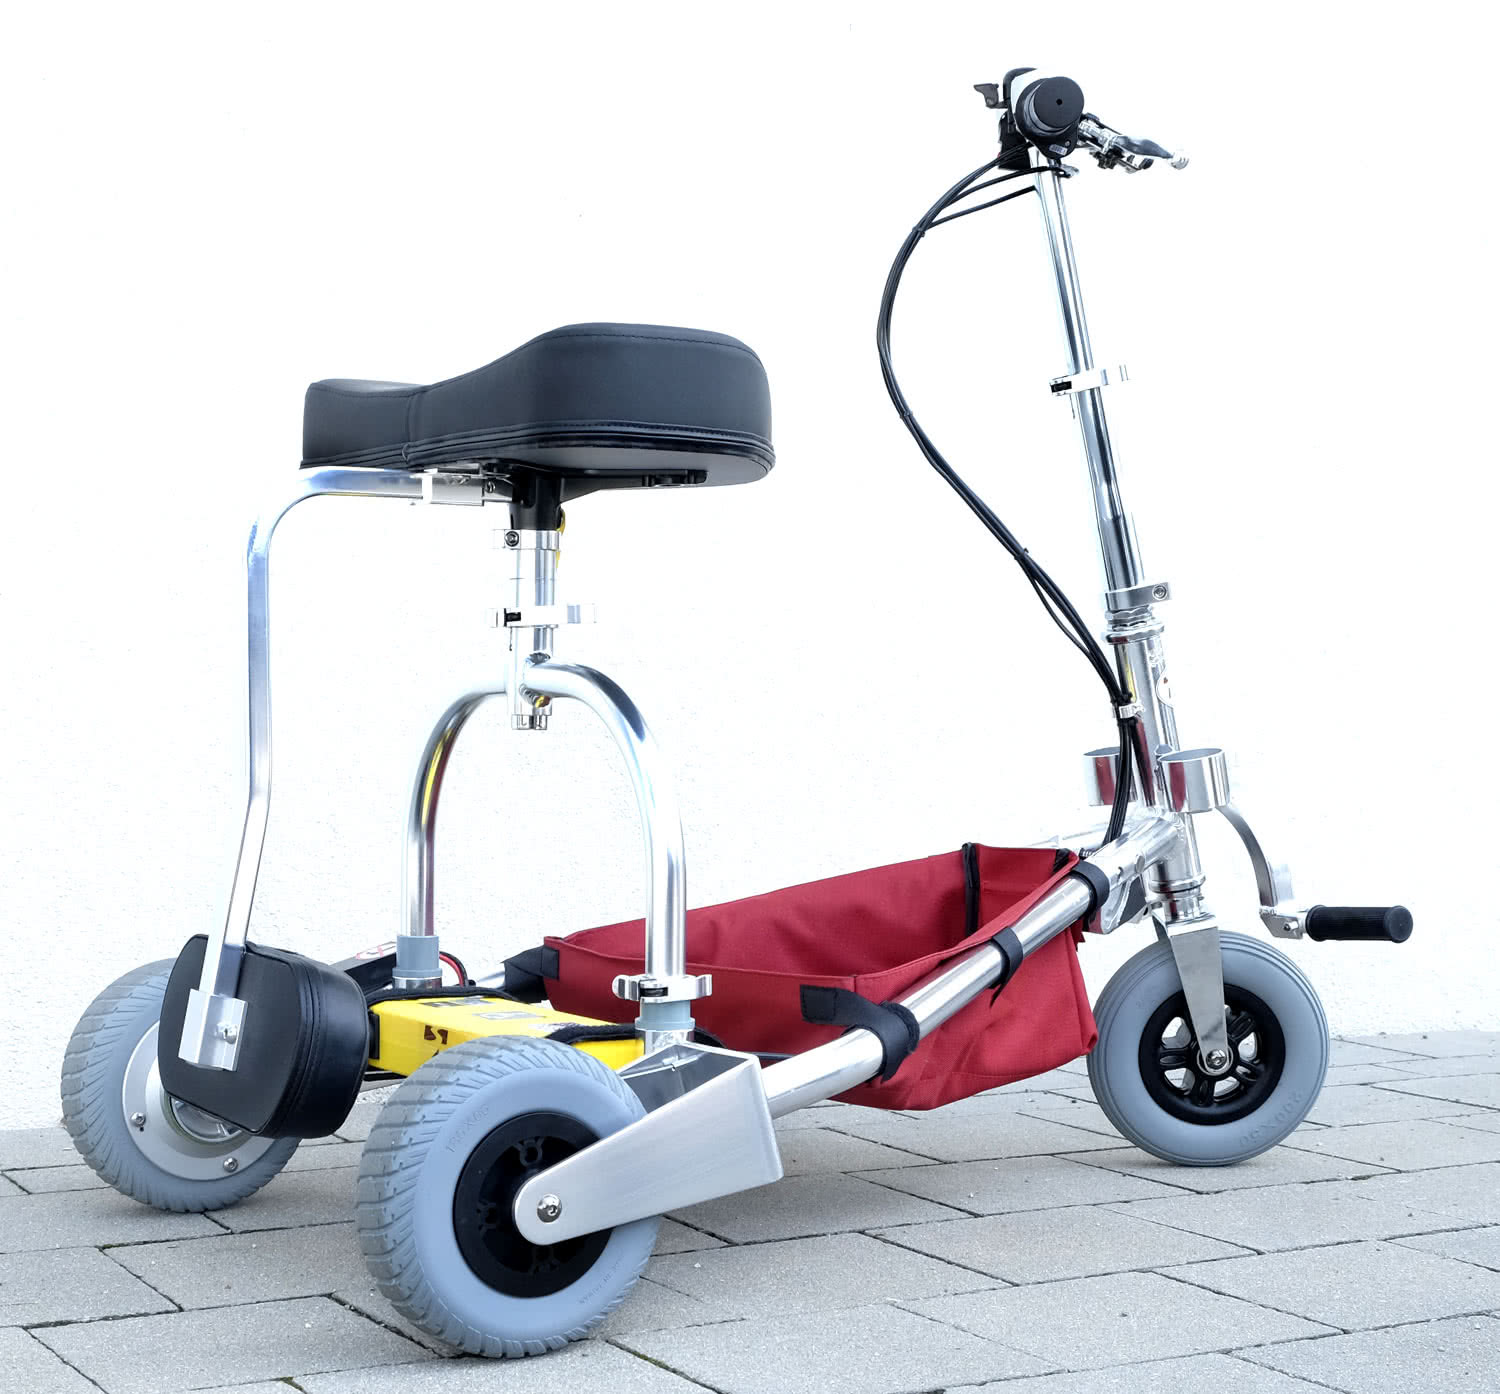
Preparing your TravelScoot ™ for air transport
You have two options:
One option is to transport the TravelScoot ™ fully set up and unprotected. While this is easier for the mobility impaired traveller, it has the distinct disadvantage that the scooter may be damaged by airport personnel during the often-hectic loading procedure, which would render the scooter inoperable. The airlines are liable for any repairs or replacements, but this can’t be done immediately, possibly leaving the traveller totally stranded. It is also very questionable to what extent any additional expenses incurred during the rest of the trip will be reimbursed.
The risk of this personal disaster can only be avoided by folding the vehicle and packing it with appropriate padding. But finding a suitable case, preferably with wheels – a question that has been raised for just about 20 years, which is how long the TravelScoot ™ has been around – has always faced the opposing question: what to do with the enormous cases when not in use? Luggage storage at airports is not cheap (if available at all).
TravelScoot ™ user Richard Hayman was the first to answer this question in a way that was both effective and logical: Two XXL suitcases of different sizes, but otherwise identical. The smaller of the two contains your personal luggage and is "hidden" in the larger - still empty - suitcase while you are using the TravelScoot ™, so it can be pulled behind the TravelScoot ™. When you check in, the smaller suitcase is removed and the folded TravelScoot ™ is placed in the larger one. This suitcase containing the TravelScoot ™ is transported free of charge by the airline (universally required in all countries).


Most luggage sets on the market are three-piece sets, and the largest one is still too small for the TravelScoot ™.
The overall solution is a four-part suitcase set, i.e. four suitcases that fit together perfectly - also practical for storage at home. It is intended to use three of them when traveling. The smallest suitcase is intended as hand luggage, and the largest fits the folded and well-padded TravelScoot ™ completely. The two middle ones are used depending on the how much you need to pack. The suitcases are all matching TravelScoot ™ Red and Green, so duplicates are unlikely and can therefore be found much more easily if lost, as well as identified from a distance on the baggage carousel. The largest piece also clearly bears the TravelScoot ™ logo and includes a pictogram and special-handling symbols.
During check-in at the airport:
Drive up to the check-in counter with your TravelScoot ™ and explain how you wish to check your scooter. The best way to do this is with the help of pictures. Request wheelchair service at this time if not done so in advance. Once this has been accomplished, find an open space away from the other passengers standing in line where you can pack the TravelScoot into your suitcase. Your wheelchair service should appear during this time; Hand over the two pieces of luggage at the check-in desk. You will able to take a maximum of two batteries with up to 300Wh each into the cabin as hand luggage.
Continue registering the assembled electromobile.
1. Check-In
- Remain seated during check-in. This allows the agent to recognize that you have a walking disability without further discussion.
- It is not necessary to fold and pack your TravelScoot ™.
- Stack any spare batteries on top of your main battery so they are in plain sight when going through security. Do not place any batteries in your luggage!
To ease the aircraft loading process we suggest removing the backrest early (possibly at home) and packing it with your luggage, if possible. This permits larger luggage pieces to be placed across the frame in front of the seat, if you are able and willing to get on and off your TravelScoot ™ from behind.*
*We have recently introduced a seat plate modification that lets you install the backrest upside down. That eliminates the problem of where to put the backrest when it needs to be removed for stowage aboard a passenger plane. The spring button can remain installed in the bottom of the backrest elbow like before, or, with the aid of pair of pliers it can be relocated to the left or right side to allow inverted installation. With some skills this modification can be implemented also on an older TravelScoot ™
2. At the gate
Stay in the gate agent's field of vision; Passengers with disabilities as well as families with children get priority boarding.
3. Boarding the plane with the mobility scooter
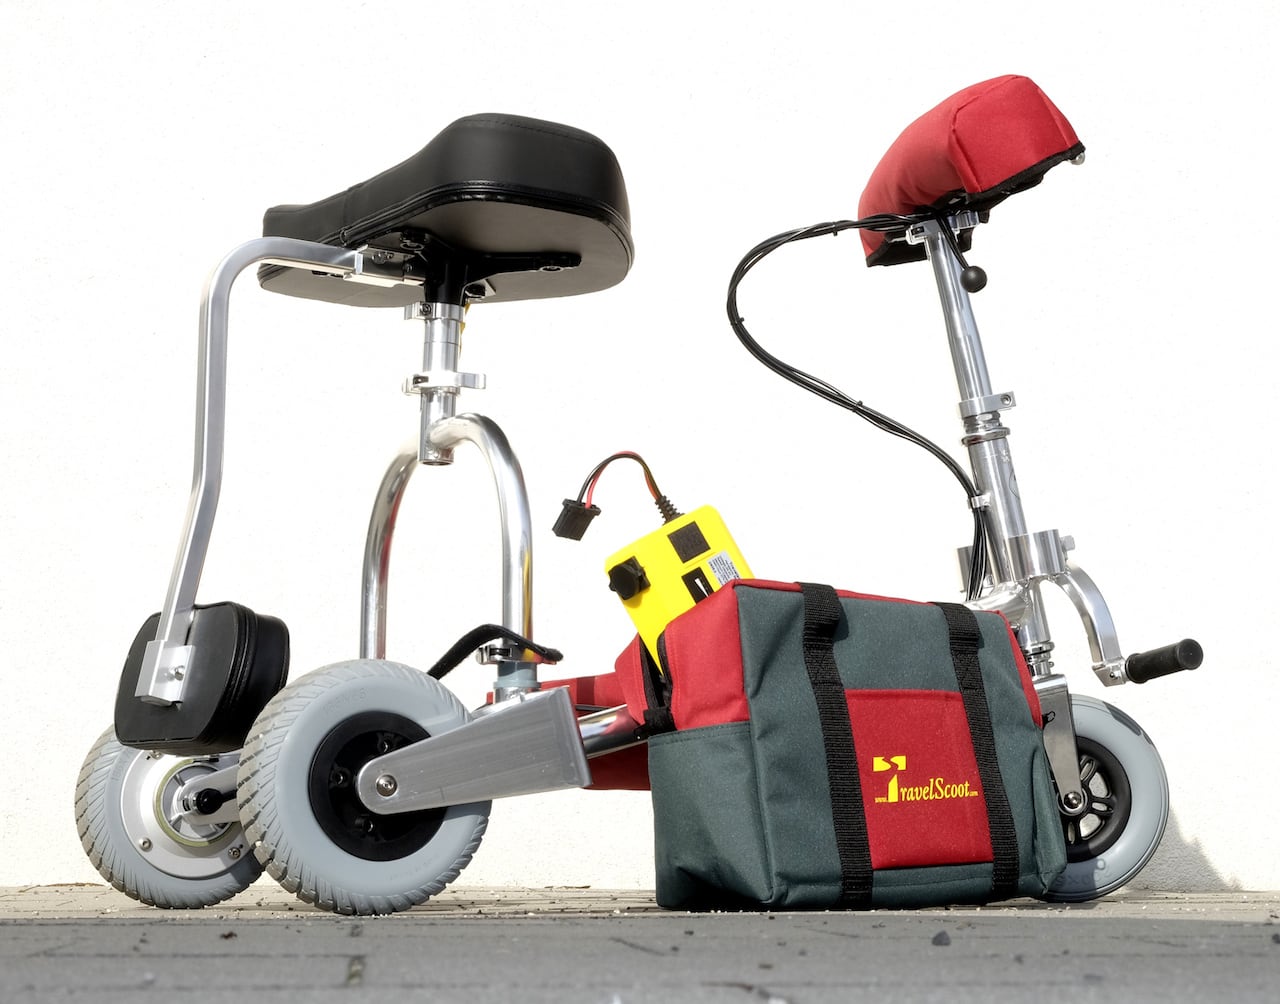
Batteries are not permitted in the cargo hold, but must be removed, placed in a suitable case (our Travel set, for example) and carried by the passenger into the cabin.
Remove the battery/batteries, place in the padded Travel set bag, install the padded Travel set handlebar cover over the handlebars, and lower the handlebars to the lowest setting. Once the backrest is installed in the inverted position, just release the seat lever clamp, lift the seat up a bit, rotate it 180 degrees, lower again and close the lever clamp.
 Preparing the TravelScoot for the hold
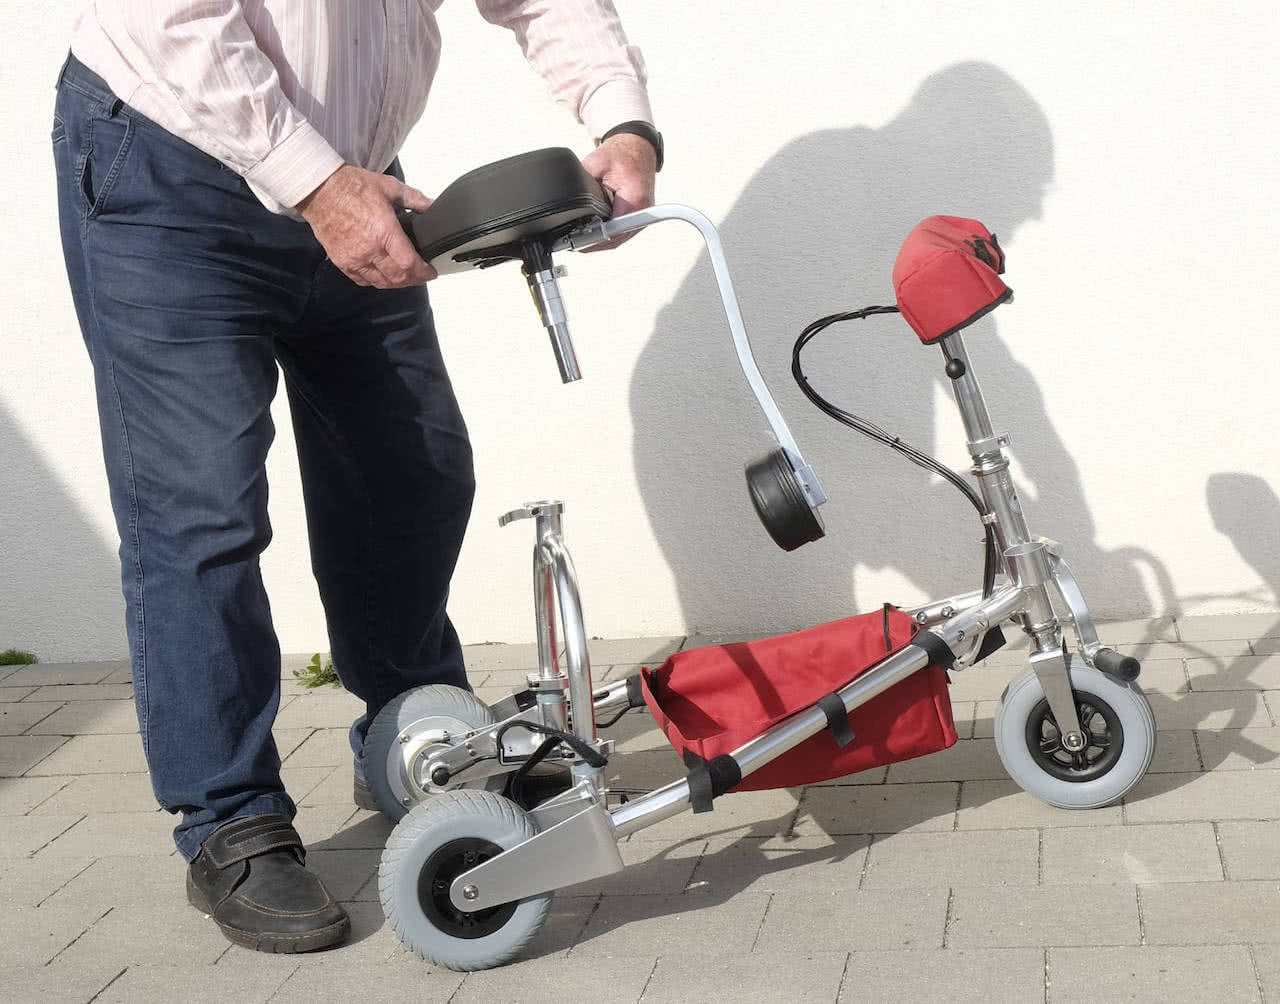 Pull out the seat of the TravelScoot and turn 180°
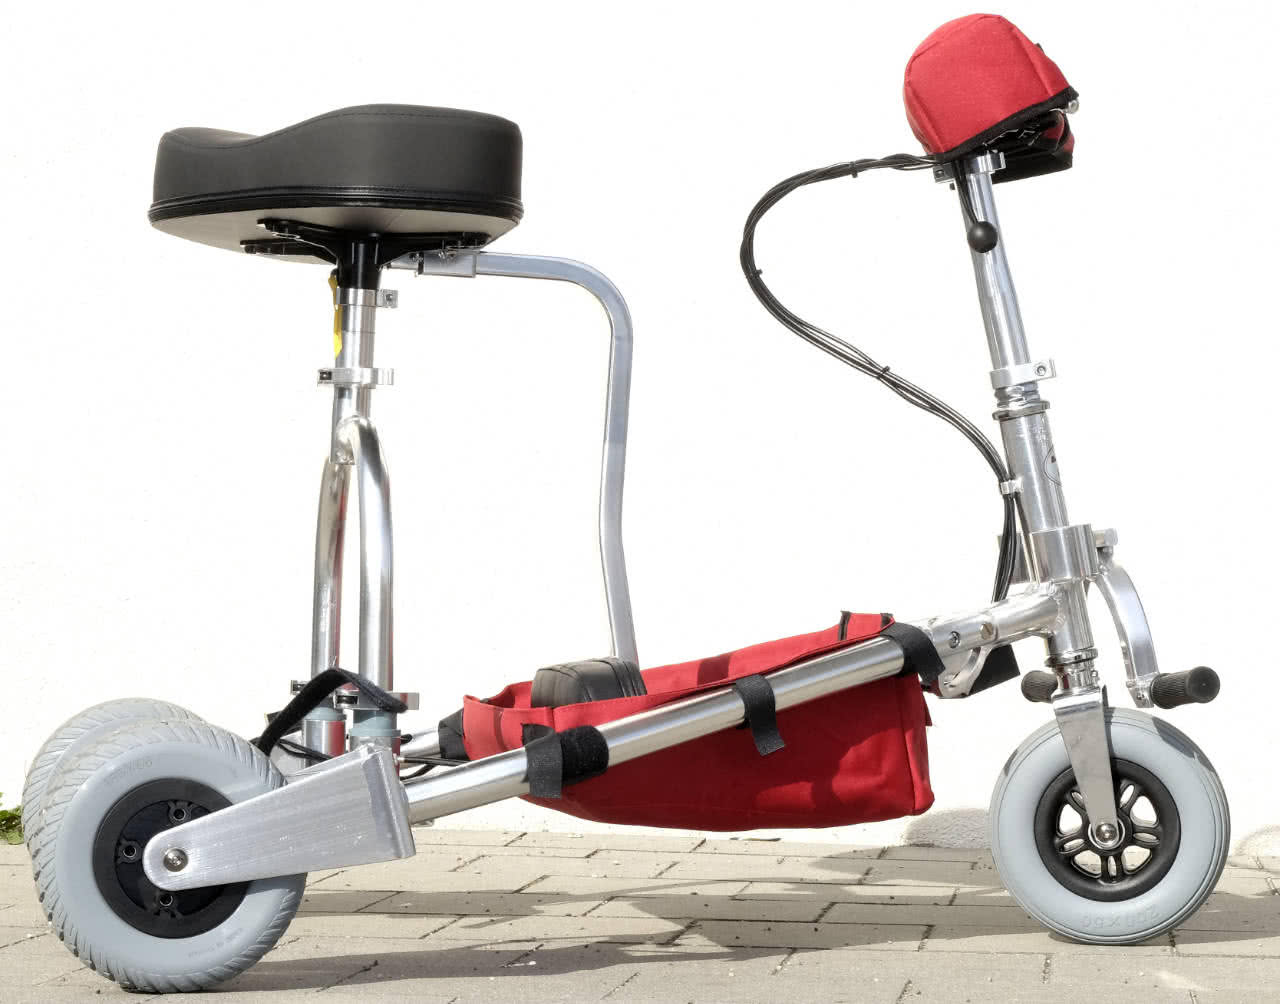 Replace the seat of the travelScoot and close the clamp
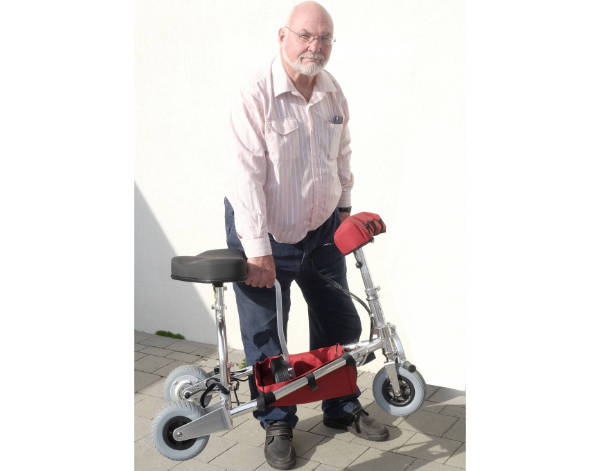
4. After landing
Remain seated until all other passengers have deplaned. It will take a while for your TravelScoot ™ is either brought to the aircraft or you are taken to baggage claim by wheelchair.
It is a good idea to contact a flight attendant (maybe the one welcoming you on board and who has seen you handing off your TravelScoot ™) and ask them to assist you in getting “reunited” with your scooter at your destination.